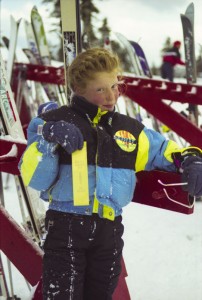
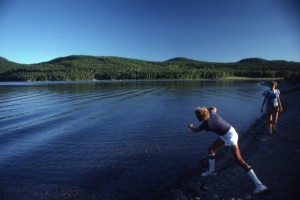
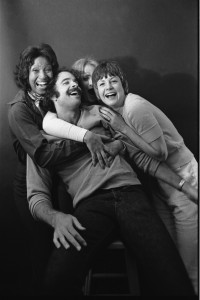
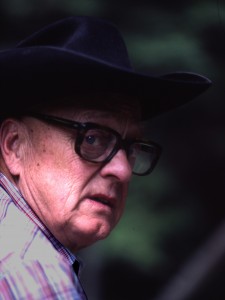
 I no longer have any living parents or siblings. The accumulation of family photographs, 16mm Kodachrome home movies, and a slew of randomly-sized negatives are now in my possession. Yikes! And this treasure doesn’t include all the photos and negatives from my Sooney’s side of the family. While I see this accumulation as a wonderful gift, others may view it as daunting responsibility; it’s more than just sorting things out and distributing them to relatives. What really jars my sensibilities are the ramifications of digitally scanning these heirlooms and what those scans mean to others less interested in the process and more interested in a product.
Beginning in the late 60’s, I took photos of everything, both in color and in black & white. With what I envisioned an artistic slant, I principally shot Kodachrome slides and Tri-X black & white negative film and spent hours in my small darkroom, a converted closet just off the huge living room of my apartment on Arlington St. in Pasadena. Back and forth I carefully carried trays of developing solutions and roll film developing tanks to and from the kitchen, my only source of running water. The results of processing those hundreds of rolls, in addition to stains on that long-replaced shag rug, are still with me, neatly organized in sleeves of strips of six negatives, all contact printed and labeled.
Slides were treated differently as I never attempted to develop my own film. That was principally handled by Kodak, and took approximately a week for the turnaround time. The cost of film and processing probably influenced my choice, but with my teaching career providing me summers to travel and shoot slides, the choice was easier to make. Looking back, it’s safe to say that the black & white camera tended to capture experiences with people, and the ‘chromes experiences in nature. And yes, there were usually two cameras on board—each loaded with its specific film just in case.
The slides are now organized in both slide carousels, ready for the next slide show on my vintage Kodak carousel projector, and hundreds of others in boxes and sleeves, organized in a myriad number of categories. And these are the ones that survived the cut. Early on, Sooney and I made a pact we still adhere to—show only the good ones, and toss the rest. Slide shows with friends was a regular event, and the 12’ ceilings in my apartment, a converted carriage house from the Anheuser-Busch estate, provided the quintessential screen.
 In the early 80’s our daughter Alicia was born, and a more snapshot style of photography became prominent. It’s not that the black & white and slide era ended, it’s just that the camera was used to document family events and prints were more suited for scrapbooks and sharing with grandparents than any other format. And with every roll of color negatives processed, we opted for the free offer of double prints. Because I tend to take several exposures of a single composition, multiple prints were distributed throughout the family with one copy usually ending up in a slip-in photo album. In some instances, multiple prints were stored in a single sleeve pocket due to the increasing number of paper prints. After our parents died, we ended up getting those prints back and, after careful scrutiny, discarded most of the duplicates and thankfully retaining the negatives. There lay the problem, because hundreds of strips of professionally produced negatives were dutifully stored in their envelopes but most without any sort of description. Negatives aren’t easy to identify, and it’s been a slow process to label the envelopes with their contents. What’s more, a roll of negative film usually remained in the camera for weeks and processed when completed, making matters more complicated as there might be several outings, play days, school and family events all captured on a single roll.
 When I was processing my own black & white film, I’d shoot an event, often consuming several rolls, and process the film that night. If a roll wasn’t finished, no problem. Half a roll was better than waiting, and film was reasonably priced. Negatives from our parents’ photography worsened the situation, and distinguishing negatives from early family gatherings became an important project since most of the prints were either faded (at best) or lost completely. We didn’t dare throw any negs out without determine with certainty there weren’t priceless images on them of deceased relatives. It’s become clear that something must be done to archive these photos and how you proceed brings up several strategies that vary in complexity and philosophy.
A friend wanted a photo of her mother to hang on her kitchen wall, and a sibling had the original photo, a black & white print. Our friend had no interest other than to duplicate the print, and had it professionally scanned, printed as a 5” x 7” standard size and packaged in an 8” x 10” matted frame. I asked what resolution she’d requested for the scan, and the reply was whatever it took to accomplish the project, most likely 300 dpi (a printing stand meaning Dots per Inch). That would have resulted in a 1-2MB file with a .jpg extension (e.g. mom.jpg) and with approximate dimensions of 1500 x 2100 pixels. What if, however, the original photo is lost over the next 50 years but the scanned image survived? And, taking this further, what if a distant relative, say 5 generations later, wishes to print the image as part of a genealogy project? We’re talking 100 years down the road. First, will the original file even be readable? Surely the compression schemes used today (.jpg, & .tiff being the most common) will be replaced soon with others arguably better, but how long will they survive? Furthermore, assuming the original scan was readable, would that 2100 x 1500 pixel scan render a desirable product for future generations? Probably disappointing, especially since the quality of the original scan could have been considerably better.
Here’s what I mean. What if the original scan was made at 600 dpi instead, resulting in an image more like 3000 x 4200 pixels and a considerably larger file size? While a 5” x 7” print is easily produced from a scan that large, so is an 11” x 14” print (or even larger). Furthermore, while the scanning process may take 3-4 times as long (2-3 minutes opposed to 30 seconds), the final result may not cost any more because professional scanning equipment tends to be automatic, thereby reducing labor costs. And the genealogist 5 generations down the road? I’d suggest that by properly choosing your tools and considering your options with future generations in mind, a smile will most likely reward your thoughtfulness.
So, it comes down to not IF you scan but HOW you scan (and save the resulting images). JPG is, by far, the most compatible file format for saving digital files. JPG (Joint Photographic Experts Group and pronounced JAY-peg) is probably the most compatible and popular image file format. This is the file format used by most point-and-shoot digital cameras and, in the process of saving photos onto removable memory cards, the camera’s software compresses captured pixels based on a variety of user-determined quality settings. The degree of compression can be adjusted, allowing a selectable tradeoff between storage size and image quality. Using its maximum quality compression, there is little perceptible loss in image quality. The lowest settings work just fine on web pages but pale in complexity (and quality) to images required by printing firms. On the surface, it appears to boil down to file size; the lower the setting, the smaller the file size, allowing for hundreds of photos to be stored on a single card. The tradeoff is that those severely compressed photos don’t print well, and that includes publishing to coffee table photo books.
Another important consideration of the JPG compression scheme is their durability. If burned onto CD or DVD media in its optimal “maximum” compression format, a JPG file will easily outlast the media it’s stored on. What DOES happen to adversely affect a JPG file is that once it’s opened in a photo editor such as Photoshop and then resaved (presumably as a JPG), the image is re-compressed and, in the process, some digital information is lost in the compression process. (It is called lossy compression.) Multiple opening, editing and resaving will decrease the color information in the image and (unless you are working on a duplicate image from one never opened) this loss is permanent.
Viewing original images stored on CD or DVD media (via your computer) will not damage your files one bit. Over time, those disks will eventually degrade, so every few years you should make new copies of your storage media. You should also transfer your images from your disk to some type of hard drive or thumb drive, just as a backup method.
Another popular file format for saving graphic images is TIFF (Tagged Image File Format). Put simply, TIFF images do not differ from JPGs in terms of resolution; the basic difference between the two is file size because TIFFs are not compressed and retain ALL the pixels captured in an image. Were you to compare an ORIGINAL JPG with a TIFF save, you will not see a noticeable loss of image pixels.
I read on an online professional scanning site that generating TIFF scans “will require a much higher cost because of the added time it takes to work (on) such an image in Photoshop, the time it takes to save such a large image, the storage HD space, and the DVD space that is required for such a large images.” That may be true for their system but, in reality, the added cost is pure bogus. If money is an issue, go with the cheaper JPG save and, when you receive your scanned images, IMMEDIATELY open them in a photo editor (e.g. Preview or Photoshop) and save them as TIFFs (you’ll now have 2 exact duplicates, the original TIFF and a considerably smaller JPG). As I stated earlier, the original JPG saved at maximum resolution quality will have the same pixel quality as a TIFF. Subsequent opening, editing, cropping, and resaving that TIFF file will result in no further degradation. I’ll add here that when working in iPhoto, any editing of that TIFF file (yes, iPhoto imports them among several others) is non-destructive—you may, at any time, revert back to your original image.
One final consideration when saving either format. Some software and social media and photo submission sites don’t accept TIFFs. It’s also likely that JPGs are easier to transfer via email due to their small size (bandwidth can be an issue but not nearly as much as in the old, dial-up connectivity days). But, if the lossy resolution issue concerns you, a TIFF can always be saved as a JPG and network portability becomes a non-issue.

Here’s what I know about scanning negatives. In order to generate a file size suitable for producing a large print (e.g. 11×14 or even larger), you need pixel resolution in the 4000 range or more. Bear in mind that conventional computer screens have a MAXIMUM resolution of nearly 1300 pixels across, and photos look fabulous on them. But when it comes to printing, an entirely different concern comes into play: pixels. If a file is enlarged beyond its optimum printing capacity, the image becomes “pixelated” and you begin to see squiggly lines along the edges of ![]() items in the photo. These are pixels that don’t show up when printing smaller images. Hence, if you’re considering printing large photographs, you need to work with large images. Producing these large images in newer digital cameras is easy; merely set your output to be the largest and finest the camera will produce. However, when you consider digitizing a 35mm negative or slide, it’s important to scan those tiny items at a minimum of 1,600 dpi (dots per inch) but optimally at 2,400 dpi or larger. Newer scanners have the ability of scanning at 9,600 and larger, by the way. In order to obtain enough pixel information from a 35mm original, the scanning takes several minutes (at 1,600 dpi) and who knows how long at higher resolutions. The product is measurably better because more data is collected from the original, resulting in less pixelation as you print larger images. The big issue here is that doing these scans ourselves takes an inordinate amount of time.
items in the photo. These are pixels that don’t show up when printing smaller images. Hence, if you’re considering printing large photographs, you need to work with large images. Producing these large images in newer digital cameras is easy; merely set your output to be the largest and finest the camera will produce. However, when you consider digitizing a 35mm negative or slide, it’s important to scan those tiny items at a minimum of 1,600 dpi (dots per inch) but optimally at 2,400 dpi or larger. Newer scanners have the ability of scanning at 9,600 and larger, by the way. In order to obtain enough pixel information from a 35mm original, the scanning takes several minutes (at 1,600 dpi) and who knows how long at higher resolutions. The product is measurably better because more data is collected from the original, resulting in less pixelation as you print larger images. The big issue here is that doing these scans ourselves takes an inordinate amount of time.
 Sooney and I once discussed activities for her sister’s (now-past) week-long visit. Since we had several envelopes full of 8×10 prints taken by their father in the 50’s (he was a press photographer with the LA Daily News), a possible scanning project came up. I suggested placing a tray of photos next to the scanner (located adjacent to a heavily trafficked part of our house). Each time one of us passed the scanner, a print would be dropped onto the document table, the computer awakened, the scan button clicked, and you proceed on your way. The next time one of us passed the scan station, the photo would be replaced and the procedure would be repeated. And so on. If 10 high-resolution scans were made each day, we’d have something to share in no time, with little fanfare and considerable pleasure at having completed the job of archiving (part of) the family heirloom. (Great ideas perish through inactivity).
If you’re considering digitizing hundreds of negatives and slides, perhaps renting a professional scanner for the slides would be a better idea because the better ones have bulk loaders. But they’re terribly expensive ($1-2000) and to have a large quantity of hi-res scans professionally done might cost upwards to $1 per scan. There’s always Scan Cafe to consider if you’re comfortable shipping your slides overseas. And don’t forget the scanners in the OLLI computer lab (they’re free to use and SOU Tech support may be scheduled).
Finally, there’s a very real situation that merits attention. Once your precious media is scanned, it’s likely that every image will have at least a few dust spots and small microscopic scratches on them (regardless of how carefully you clean them before scanning). There’s nothing worse when admiring a large print than discovering something so annoyingly apparent—and so easily eradicated. Careful spotting is laboriously performed on the computer using specialized software (e.g. iPhoto has a “retouch” tool, and the more sophisticated Adobe Photo Elements is available at the SOU bookstore and may be eligible for the OLLI discount). Either way, plan for it.
